WebLogic Server 11g (10.3.6)
installation
This article
presents a brief overview of installing Oracle WebLogic Server (WLS) 11gR1
(10.3.6) on RHEL6.
Setup
Create a new
group and user.
Create the
directories in which the Oracle software will be installed.
Append the
following entries into the "/home/oracle/.bash_profile" file.

Installation
Run the installer as the "oradev"
user.
Click the "Next" button on the
welcome screen.
Enter the middleware home ("/u01/app/oracle/middleware") and click the "Next" button
Accept the warning about the directory not being empty, click Yes
Either enter your support details, or attempt to uncheck the security updates checkbox. The box doesn't actually uncheck, but presents you with a warning dialog. If you click the "Yes" button, indicating you don't want updates, you are returned to the same screen with the box still checked. Click the "Next" button anyway.
Assuming you don't want security updates, click "Yes" and "Yes" on the subsequent warning dialogs and you are presented with the "Connection Failed" screen. Check the "I wish to remain uninformed..." checkbox and click the "Continue" button. This whole process is very confusing at first. Obviously the developers responsible didn't really expect people to say no to security updates!
Accept the typical setup by clicking the "Next" button.
Accept the default JDK selection by clicking the "Next" button.
Accept the default product installation directories by clicking the "Next" button.
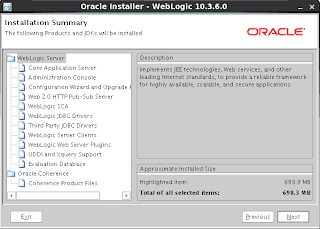
If you are happy with the summary information, click the "Next" button and wait while the installation completes.
On the installation complete screen, uncheck the "Quickstart" checkbox and click the "Done" button.
Enter the middleware home ("/u01/app/oracle/middleware") and click the "Next" button
Accept the warning about the directory not being empty, click Yes
Either enter your support details, or attempt to uncheck the security updates checkbox. The box doesn't actually uncheck, but presents you with a warning dialog. If you click the "Yes" button, indicating you don't want updates, you are returned to the same screen with the box still checked. Click the "Next" button anyway.
Confirm you wish to bypass this, click
Yes
- There is a known bug within the installer at this stage. If you get caught in a loop where you cannot bypass this, leave the box ticked and click Yes and Yes again.
- When the ‘Connection failed’ dialog appears, tick the ‘I wish to remain uninformed…’ box, then Continue and you should then make it to the next screen!
Assuming you don't want security updates, click "Yes" and "Yes" on the subsequent warning dialogs and you are presented with the "Connection Failed" screen. Check the "I wish to remain uninformed..." checkbox and click the "Continue" button. This whole process is very confusing at first. Obviously the developers responsible didn't really expect people to say no to security updates!
Accept the typical setup by clicking the "Next" button.
Accept the default JDK selection by clicking the "Next" button.
Accept the default product installation directories by clicking the "Next" button.
If you are happy with the summary information, click the "Next" button and wait while the installation completes.
On the installation complete screen, uncheck the "Quickstart" checkbox and click the "Done" button.


